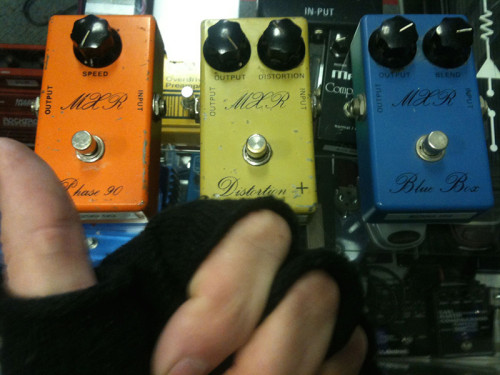
The MXR Phase 90 is kind of the benchmark for phasers. It’s been made famous by being THE phaser for Mr. Eddie Van Halen and a score of others. It’s a four stage phaser with matched jfets, meaning in plain talk that it sounds tits. It’s a smooth sounding phaser with a rich tonality. There are many versions since it was first introduced in the 70s: the original script logo version, the first block letter version, the originals with added LED indicator, and then the many re-issues since the Dunlop company bought the rights to the MXR name. The quality of the version, if you go by general opinion, is almost always commensurate with the age.
I was looking for and older one of these, and finally scored a block logo, non-LED version that I’ve dated as being made around 1978. It’s roughly the same kind Mr. Van Halen likely used. This is one of the “good ones.” I can definitely vouch for the sound, being that my Phase 90 sounds amazing on bass or guitar.
One bummer about my Phase 90 was the lack of an LED indicator, but again, it’s supposedly the better version than the later ones from the ’80s that added this feature. True or not, I was stuck with my vintage effect and no visual way to tell if it was on or off. Sure, there would likely be some swooshing noises going on, but in the wild and wooly world of modern metal, it’s sometimes hard to hear. Couple that with the modern trend of running a shit ton of pedals (because might makes right) and you can run into problems. Should I drill the box and add an LED? Would it ruin the value of my vintage Phase 90? Should I care? Luckily, I found an awesome solution lurking on the excellent DIY Stompboxes forum. I didn’t have to completely un-vintage my little treasure.
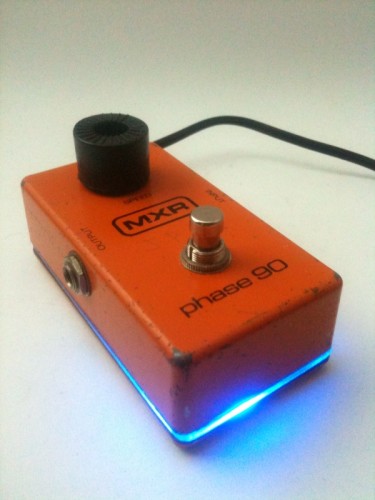
What you see there is my ’78 Phase 90 with a power indicator LED that’s glowing through a piece of plexiglass sandwiched between the box and its base. Not only did I not have to drill the effect box, but I can now feel like I’m playing bass on the Grid with Tron as my guitarist.
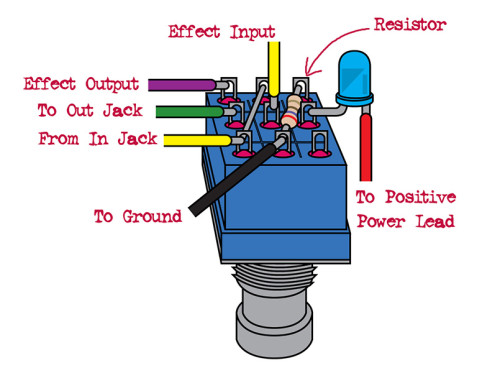
The first thing I had to do was wire a new switch into the pedal. Don’t worry, I saved the original so I can always put it back to the way it was when I bought it off the fool for way too cheap on craigslist. It’s a relatively simple procedure using a 3PDT foot switch, so you can have true-bypass for your signal and add the LED. Triple pull double throw switches mean you get three switches in one that go two directions each. These are available, for what I think is one of the more reasonable prices, over at Antique Electronic Supply.
It looks more complicated than it is. I like to wire in this specific fashion so it throws the effect input to ground, avoiding pops if possible when the pedal is engaged. I used a blue LED because they seem brightest and most effective for putting into a piece of plexiglass and actually throwing the light around significantly. Of course you need a resistor so your LED doesn’t get the full 9V from the power, or you’ll burn it out. The resistor can go on either leg of the LED, positive or negative, and I find it cleaner to put it on the negative leg. To get the value of your resistor, there’s plenty of online calculators. Or, learn some math, and use Ohm’s law if you’re some snooty know it all. Jerk.
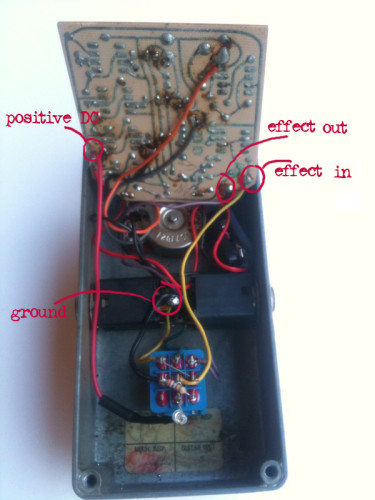
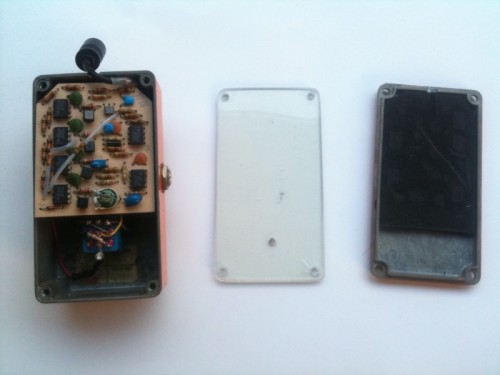
Here you can see the switch wired in, and the areas the leads go to on the circuit board and the jacks. Of course, one should already know that the in and out on the jack goes to the tip of your guitar cable, and the ground connects to the sleeve. Right? If you don’t, stop mucking about with vintage effects and ruining them. Jerk.
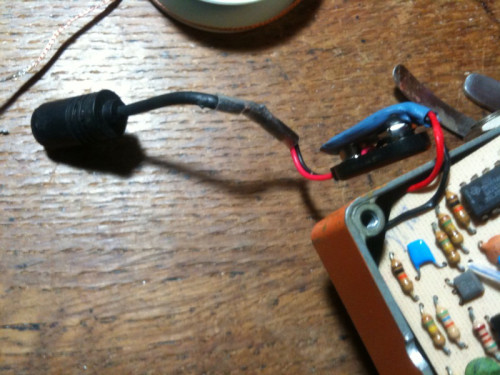
You’ve probably noticed that with the LED where I put it, there’s not gonna be room for a battery. That’s because batteries suck. I’m against going through countless 9V batteries and filling landfills while emptying my wallet. Those bastards are getting more expensive everyday. Welcome to the apocalypse and 2012! I run everything from an outlet and adapters. Let the club pay my power bill. To wit, I cobbled together a standard pedal adapter size 2.1 x 5.5 mm jack with a 9V clip to run into my Phase 90. Again, this was to avoid too much modding and still get all the benefits I wanted while using this old workhorse of a pedal.
I saw later that Visual Sound, an innovative company that invented the One Spot power adapter, makes a battery clip converter that just might be a bit more reliable than my splice job. So, get that or go full DIY for more fun. Whatevs.
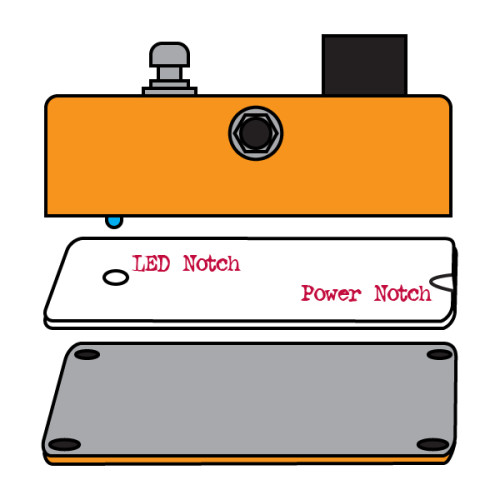
The final step is to whip out a Dremel or some other kind of hobby tool and cut some plexiglass. I did mine with some seriously bare-bones skill, just tracing the pedal on the plexiglass and sanding the edges until it fit the way I wanted it to. I made a rough mark where the LED hit, and drilled a little bit into the plexiglass. The LED has to sit INSIDE the plexiglass for it to cast the light properly to the sides. I also cut a little foam I picked up from Soul Depot for insulation, as the original insulation was all but dust.
Sandwich it all together and you’ve got a tasty vintage Phase 90 WITH power indicator. You’ve kept it basically original (no box drilling) and can put it all back together to sell on eBay later when you’ve run out of money for heroin, you horrible junkie musician loser. Point of fact, you can do this with ANY vintage MXR pedal, and with a myriad of other brands.
Below, you can see me rocking my Phase 90 for all of maybe 6 seconds during a bass break in the song “Veils” during Ludicra’s appearance at the 2011 Roadburn Festival in Tilburg, Netherlands. Don’t blink your ears, or you’ll miss it at about 5:15.
This show was part of the last tour for Ludicra, and I still have some of the tour posters for sale on my site. So of course, you should buy one. They’re quite nifty.
Or, specific to Ludicra’s appearance at the Roadburn Festival, you can pick up one of the beautiful prints by Davey D’Andrea, available in his webstore.
In fact, pick up both. They don’t call us “starving artists” without due cause.
“Set phasers on fucking kill!”
ADDENDUM:
From Aron Nelson’s DIY Stompbox forum… they now sell a Plexiglass piece for this EXACT project.
1590B Light Plate
I can’t vouch for this fitting older MXR boxes, but it’s an interesting product anyway.
Also, the link to the forum topic where I found this originally…
http://www.diystompboxes.com/smfforum/index.php?topic=66840.0



great insight!! thanks x sharing
You legend. This mod was so easy and works like a charm. Cheers mate. Alex from Western Australia
I wired a 74 reissue this way tonight, works but get a very loud pop engaging the pedal. Do you experience this?
I do not get a loud pop, but there is potential for this in any pedal with a mechanical switch. It has to do with DC bleed from capacitors in the effects circuit. They build up potential and pop it out when you engage the effect. In most cases, like mine, having the effect input switch to ground at its input when bypassed is enough (it probably pops a little, but is too quiet to hear). Make sure your 3pdt is connecting the effect input to ground in bypass mode. Because all caps are different in terms of age and tolerance, you may have to add a pull down resistor on the effects output to ground. It releases the cap potential when you switch. This is a good article covering that. https://www.mrblackpedals.com/blogs/straight-jive/6629778-what-really-causes-switch-pop